This article shows an example of how to manage users with respect to Airlock 2FA.
Goal
- Understand how Airlock 2FA can be enabled for a user.
- Understand how to manage Airlock 2FA tokens.
- Learn how to prepare a user for token migration to Airlock 2FA.
- Learn how to generate an activation letter for an Airlock 2FA user.
All following procedures are exemplary and will vary according to your setup or needs.
Initial thoughts
The following examples use the Airlock IAM Adminapp. A REST API for all administrative actions of the Airlock IAM Adminapp is available.
- All admin actions shown below are subject to access control.
- Review the access control configuration in the Adminapp.
- In the following, we assume, that the administrator has all the necessary privileges.
Prerequisites
- The IAM Adminapp is configured, so users and authentication tokens can be managed.
- The Airlock 2FA Token Controller is configured in the IAM Adminapp.
- The administrator has enough privileges (roles) to perform all shown actions.
- All examples are given on an existing user account.
Prepare user for migration to Airlock 2FA
Assure that token migration is enabled in the Adminapp configuration: Adminapp >> Users >> Show Migration Section.
The described procedure may also be done for multiple users at a time using the bulk change feature.
It can be enabled here: Adminapp >> Users >> Allow Bulk Changes.

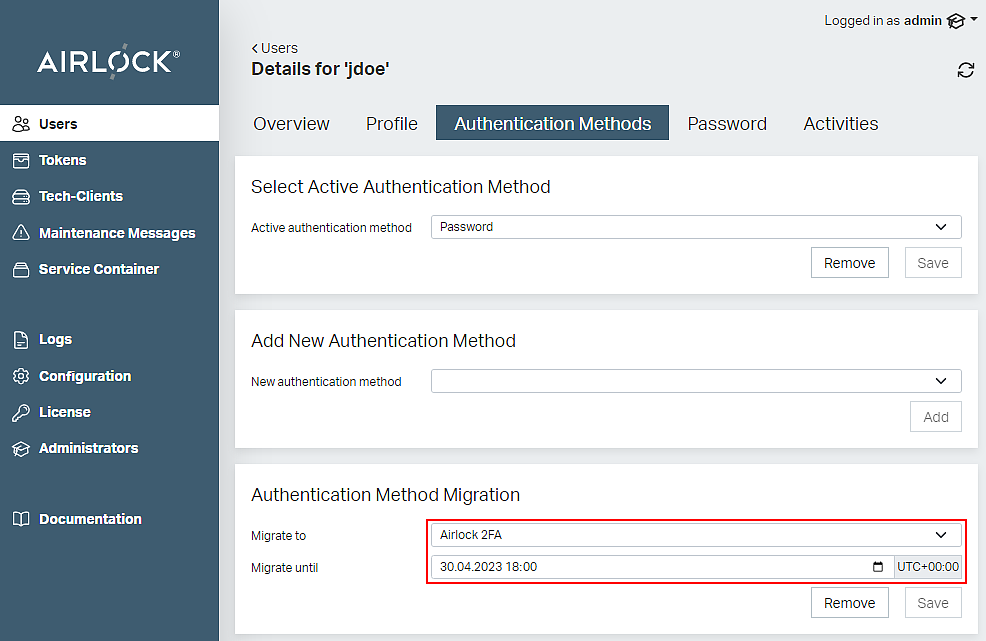
- Open the Authentication Methods tab in the user details.
- Select Airlock 2FA in the Authentication Method Migration section
- Optionally set a due date in the field Migrate until.
- Click the Save button
- The user is now asked to migrate to Airlock 2FA at the next login.
Set Airlock 2FA as second factor
To manually set Airlock 2FA as the second factor, do the following.
Assumption: The selection of the second authentication factor is based on the assigned auth method.

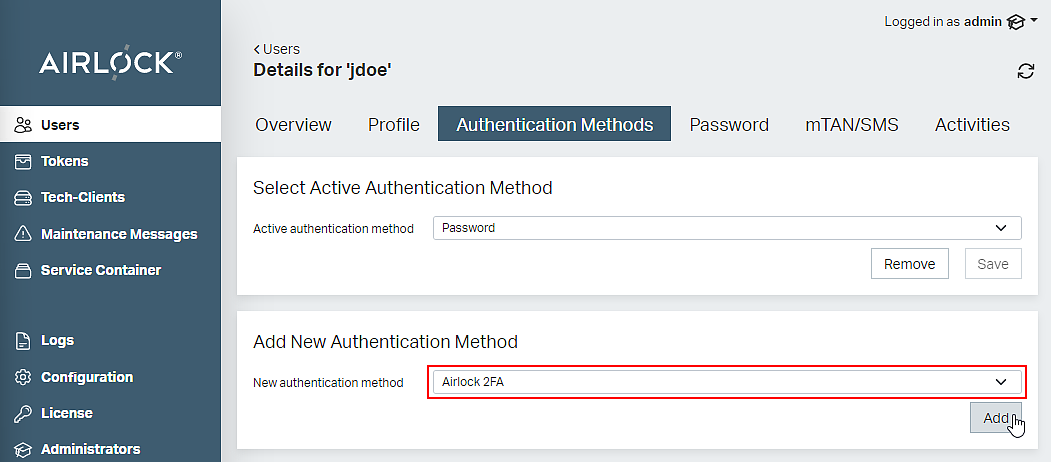
- Open the Authentication Methods tab in the user details.
- If the user has no Airlock 2FA account yet i. e. no Airlock 2FA tab is shown: In section Add New Authentication Method select Airlock 2FA and click the Add button.
- In section Select Active Authentication Method select Airlock 2FA and click the Save button.
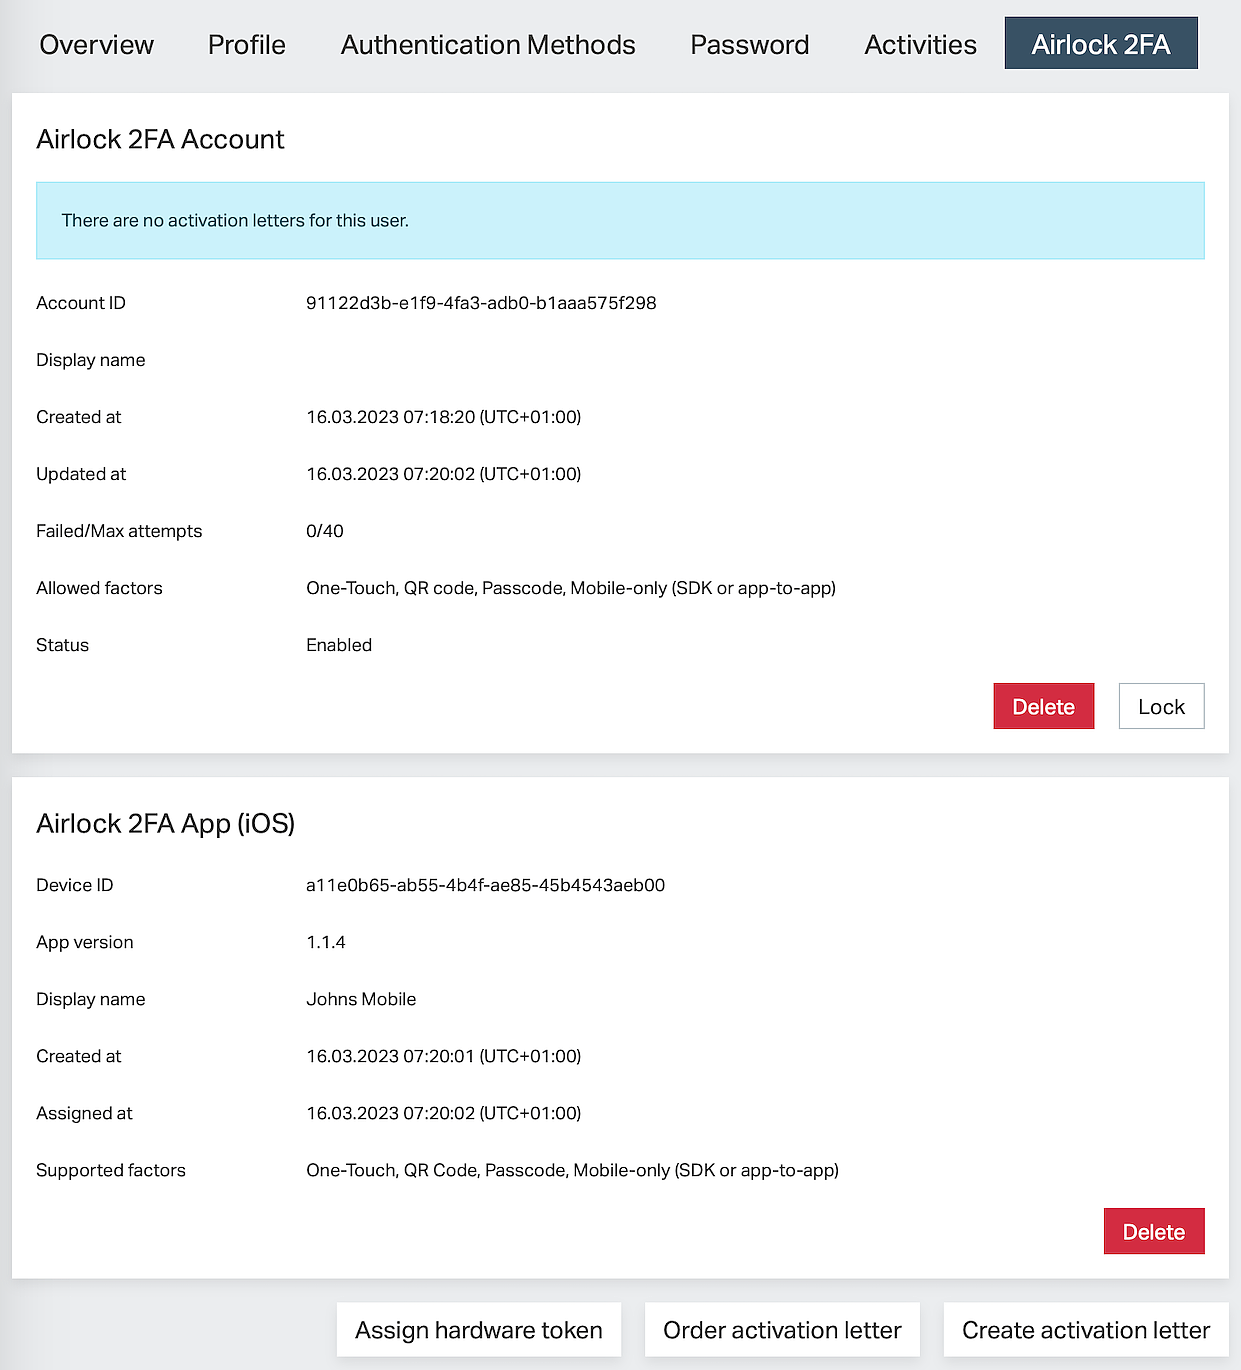
- The user has now an Airlock 2FA account as shown below. Whether the user is able to log in using Airlock 2FA depends on whether a token has been enrolled.
Airlock 2FA token management
The following screenshot shows the Airlock 2FA tab on the user detail page with account information and one enrolled token.

- Possible actions:
- Lock (or Unlock) an Airlock 2FA account:
If locked, Airlock 2FA tokens cannot be used anymore for authentication or transaction approval. - Delete in section Airlock 2FA Account:
This will remove Airlock 2FA including all devices. It will also remove the corresponding account in the Futurae cloud. - Delete in section Airlock 2FA App (iOS/Android):
This will remove the corresponding token. The Airlock 2FA account still remains and new tokens can be enrolled by the user. - Create activation letter: Creates an activation letter and stores the generated PDF in the pre-configured directory (e.g. instances/auth/pdfs/).
- Order activation letter (button not shown in the screenshot above): allows ordering an activation letter which is then generated by the corresponding service container task.
This action cannot be undone.
This action cannot be undone.
Limitations
- Modification of Airlock 2FA accounts directly in Futurae's management web application should be avoided. This is because data regarding activation letters are stored in the Airlock IAM database only and because Airlock IAM does not support all features that can be managed in the Futurae cloud.