Maintaining actions on cluster nodes

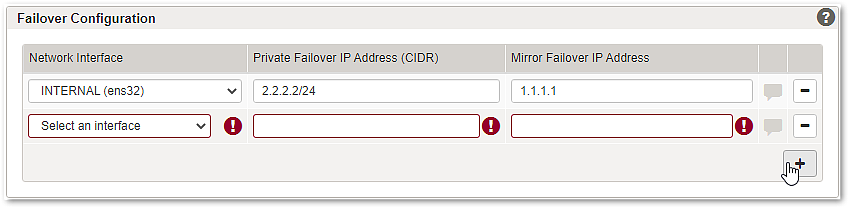
On an existing failover cluster, the Configuration Center allows hassle-free configuration changes for both cluster nodes on a single UI. For most cases, there is no need to switch via logins between both nodes – simply make your changes for both cluster nodes on the instance you are currently logged in.
The remote configuration feature eliminates the need for manual node synchronization and can be used i.e. for common maintenance purposes. Configuration validation and activation of the cluster are supported.
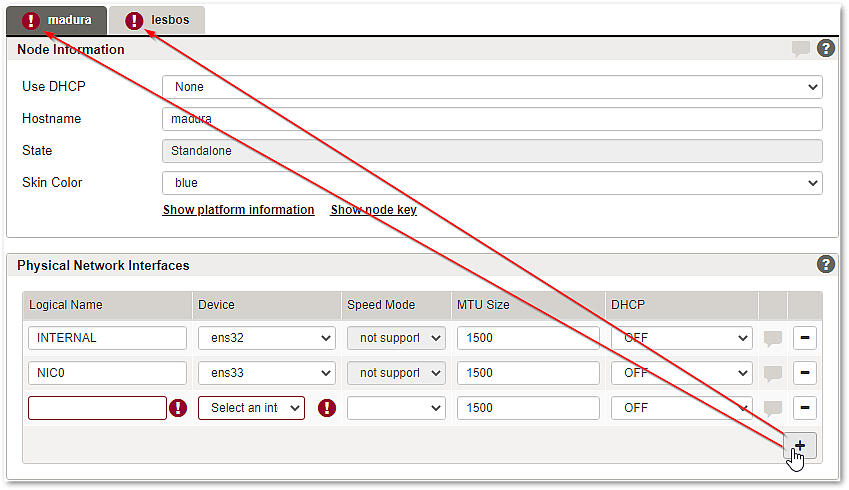
Example:

In the following screenshot, we are logged in on the cluster node madura – the 2nd tab lesbos represents the remote cluster node.

Failover cluster node tabs

Note that only the node you are currently logged in can be fully configured in order to ensure a valid failover cluster communication.

Limitations of remote node configuration (2nd tab)

The 2nd tab of Nodes & Interfaces always represents the 2nd failover cluster node. Note that some settings are greyed-out and cannot be adjusted in order to maintain the cluster configuration valid.

  • Not editable in section Node Information:
  • Hostname
  • Not editable in section Management Access:
  • Network Interface
  • IP Address (CIDR)
  • Not editable in section Physical Network Interfaces:
  • Logical Name
  • DHCP mode
  • Not editable in section Failover Configuration:
  • Network Interface
  • Private Failover IP Address (CIDR)
  • Mirror Failover IP Address

Adding network interfaces and failover configuration

New physical network interfaces and failover configuration entries can be added on the 1st tab and appear simultaneously on the 2nd tab.

  1. Example 1 – add a new network interface
  2. Click on the + button in the section Physical Network Interfaces.
  3. A new interface entry appears on tab madura and lesbos.
  4. Add new interface to cluster nodes
  5. Configure the new interface on both tabs.
  6. Validate and activate the configuration on both nodes.
  1. Example 2 – add a failover configuration
  2. Click on the + button in the section Failover Configuration.
  3. A new interface entry appears on tab madura and lesbos.
    For madura:
  4. New Failover Configuration entry a

    For lesbos:

    New Failover Configuration entry b
  5. Configure the new interface on the 1st (here: madura) tab. The configuration of the 2nd tab will be updated automatically.
  6. Validate and activate the configuration on both nodes.